For Hallowe’en see if you can Program A Pumpkin.
Bookmark this page https://cs4fn.blog/pumpkinpatch to harvest more pumpkins.
There are two versions – one for just using paper, and one for lighting up with a candle.
See 3. Linked activity sheet for activities to do in the classroom and links to computing research. Find out why computer scientists are interested in how humans express emotions.
1. Paper-only pumpkin
⬇️ Download the paper-only based version if you don’t want to use a jam jar or tea light (A4)
⬇️ Download the same but re-sized for American printers (US Letter)
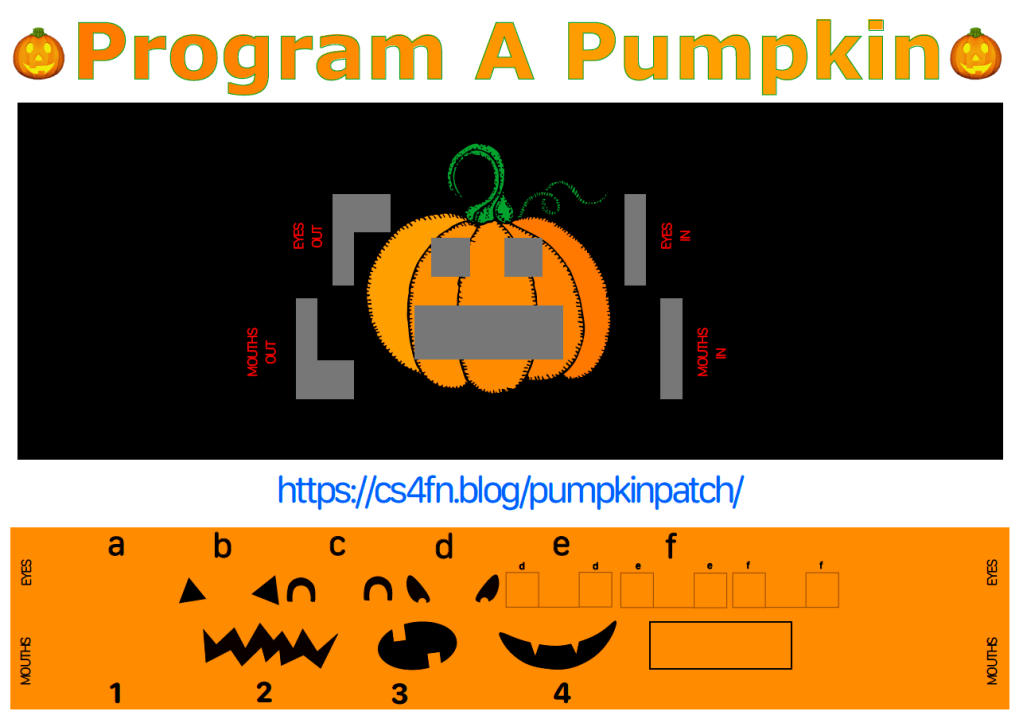
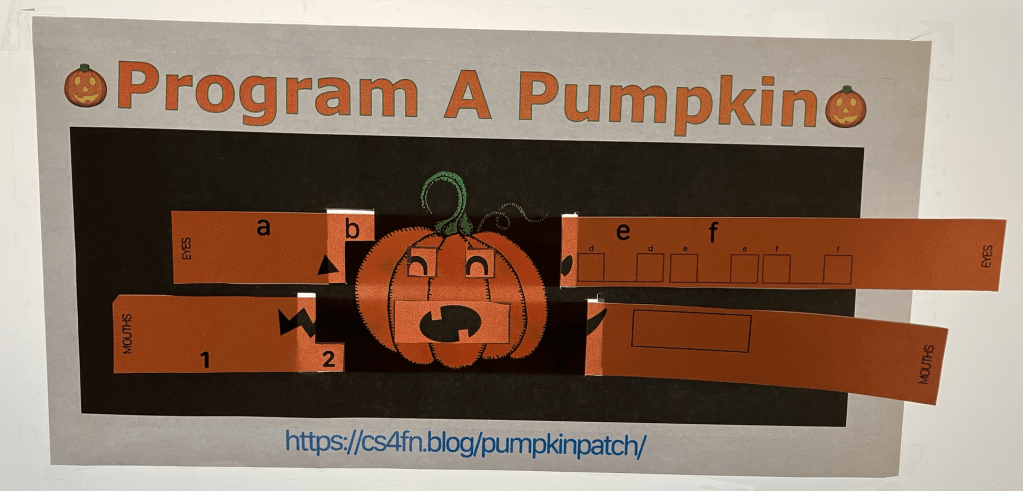
Print, then cut off the two orange strips at the bottom and separate them. Cut out the grey ‘windows’ in the black rectangle (a bit of patience and small scissors will help here) and thread the eyes strip through the top and the ‘mouths’ strip through the bottom. Slide the strips along until a letter or number appears in the little window on the left and program your pumpkin.
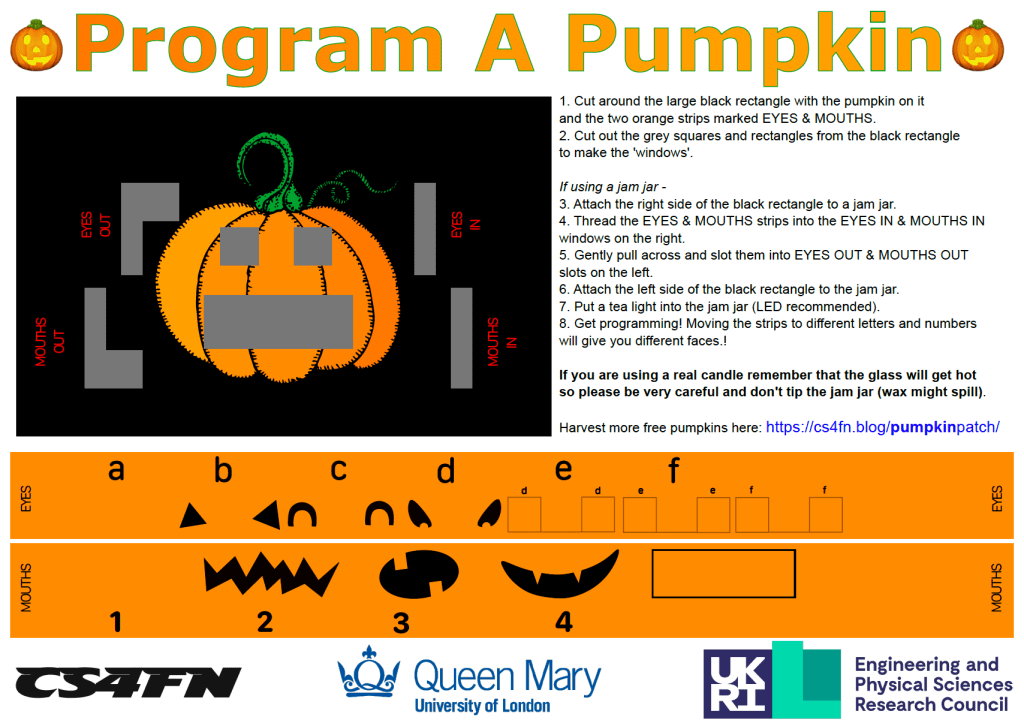
2. Progam A Pumpkin using a jam jar and a tea light.
⬇️ Download the version of Program A Pumpkin that you can use with a jam jar here (A4)
⬇️ Download the same but re-sized for American printers (US Letter)
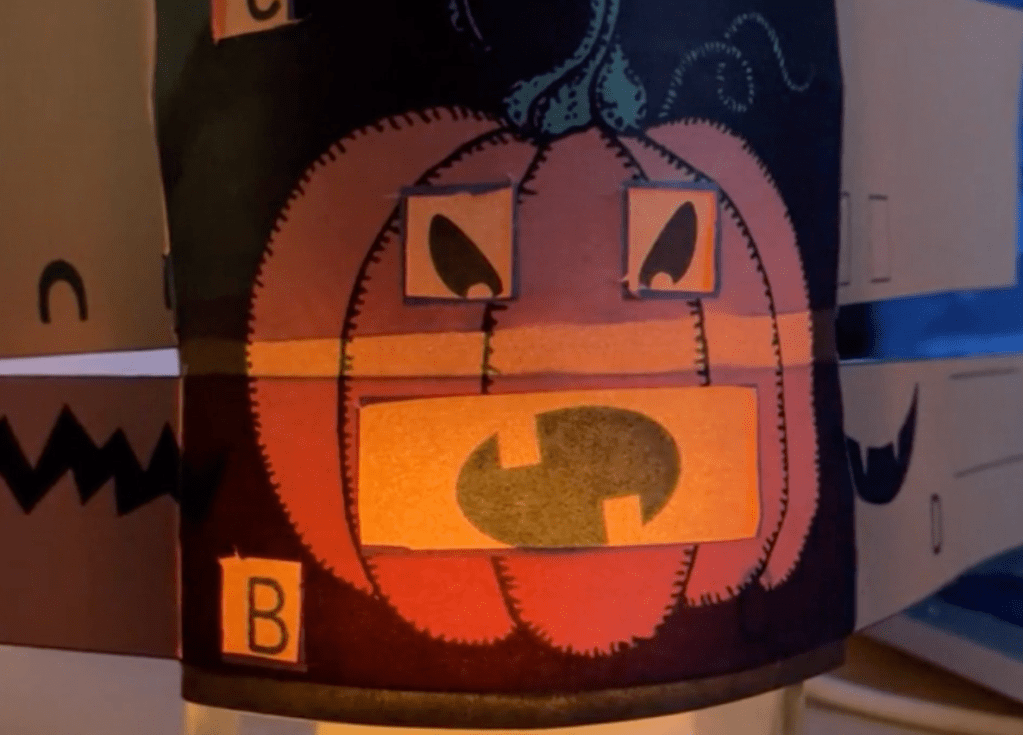
(Watch a video of the pumpkin, candle and jam jar in action)
Assembling the pumpkin
You will need
- A printer (and paper)
- Scissors (nail scissors helpful if available)
- Jam jar (optional)
- Sellotape, masking tape or blue tack (optional)
- Tea light (optional)
- Cut out the black rectangle and the two orange strips.
- Cut out the grey parts of the black rectangle (nail scissors might be easier).
- Thread the EYES strip into the EYES IN window on the right, so that it goes behind the two small square windows then thread through EYES OUT on the left.
- Do the same with the MOUTHS strip
Move either strip so that a letter appears in the little window at the left alongside a feature appearing on the pumpkin’s face.
Using a jam jar and candle to light the pumpkin
Follow the steps above (1-4), then –
5. Tape the black rectangle to the outside of the jam jar, reasonably close to the bottom of the jar so that it’s near the light.
6. Add a tea light for illumination.
3. Linked activity sheet
For classroom use we have an activity sheet which contains assembly instructions, suggested activities, instructions for ‘programming’ the pumpkin and code tables to fill in, suggestions for classroom discussion and links to computing research.

 Activity sheet for Program A Pumpkin (A4 PDF) Activity sheet for Program A Pumpkin (US Letter PDF)
Further resources
This Hallowe’en ‘Program A Pumpkin’ version is adapted from ‘The Emotion Machine‘, our free classroom activity which can be used to teach concepts like Programming, Sequences, Low-level code and high-level commands, Compilers and interpreters and Abstraction.

Jam Jars
First catch your jam jar…
Any jam jar will do. (If you use one of the teeny tiny ones you get with hotel breakfasts you will have to reduce the document’s size before printing!).

Tea lights
We recommend using battery-operated LED tea lights particularly with younger children. If using a wax candle tealight please remind children that (1) the glass jar may become hot to hold and (2) to avoid tipping the jar as the molten wax might spill out.

Wax tealights are fairly easy to come by, e.g. Argos wax tealights – 100 for £4.
Some suggestions of where you can find the LED battery versions below
Hobbycraft
4 battery operated tea lights (LED) – £2 for 4, white
12 Battery operated tea lights (LED) – £7.50 for 12, white, same in silver | also available in gold
48 battery operated tea lights (LED) – £15 for 48, white
The Range
Pack of 6 LED tea lights – white, £1.99
George at Asda
Set of 12 tea lights (2 packs of 6) – £4.50
🎃 🎃 🎃 🎃 🎃 🎃 👻 🎃 🎃 🎃 🎃 🎃 🎃 🎃 🎃 🎃 🎃 🎃 🎃 🎃 🎃 🎃 🎃 🎃 🎃 🎃 🎃 🎃
Pixabay pumpkin picture credits


🎃 🎃 🎃 🎃 🎃 🎃 👻 🎃 🎃 🎃 🎃 🎃 🎃 🎃 🎃 🎃 🎃 🎃 🎃 🎃 🎃 🎃 🎃 🎃 🎃 🎃 🎃 🎃

EPSRC supports this blog through research grant EP/W033615/1.
