The basic instructions are simple – just take two photos a few inches apart (by holding the camera firmly and moving it with your body first to the left [take photo] and then to the right [take photo]. Line the two photos up in whatever way suits you and gaze between them until the 3D effect appears.

Table of Contents
• 1. Can you see stereoscopic images?
• 2. Focusing: parallel o^o versus cross-eyed oxo
• 3. Files – example images to download to start you off
• 4. Even more files and photos to play with
• 5. YouTube videos
• 6. Further reading
Here’s how to make your own stereoscopic images with a camera (could be an actual camera or a smartphone) with which you’ll take two photographs a few inches apart, and a computer (could be a laptop or the smartphone itself) to line them up to get the stereoscopic effect.
This effect was discovered in the 1800s and is essentially ‘Victorian Virtual Reality‘. People used (and still use) stereoscopic viewers to help them see the 3D effect, though most people can actually do this without needing equipment but these stereoviewers can help (£5).
1. Can you see stereoscopic images?
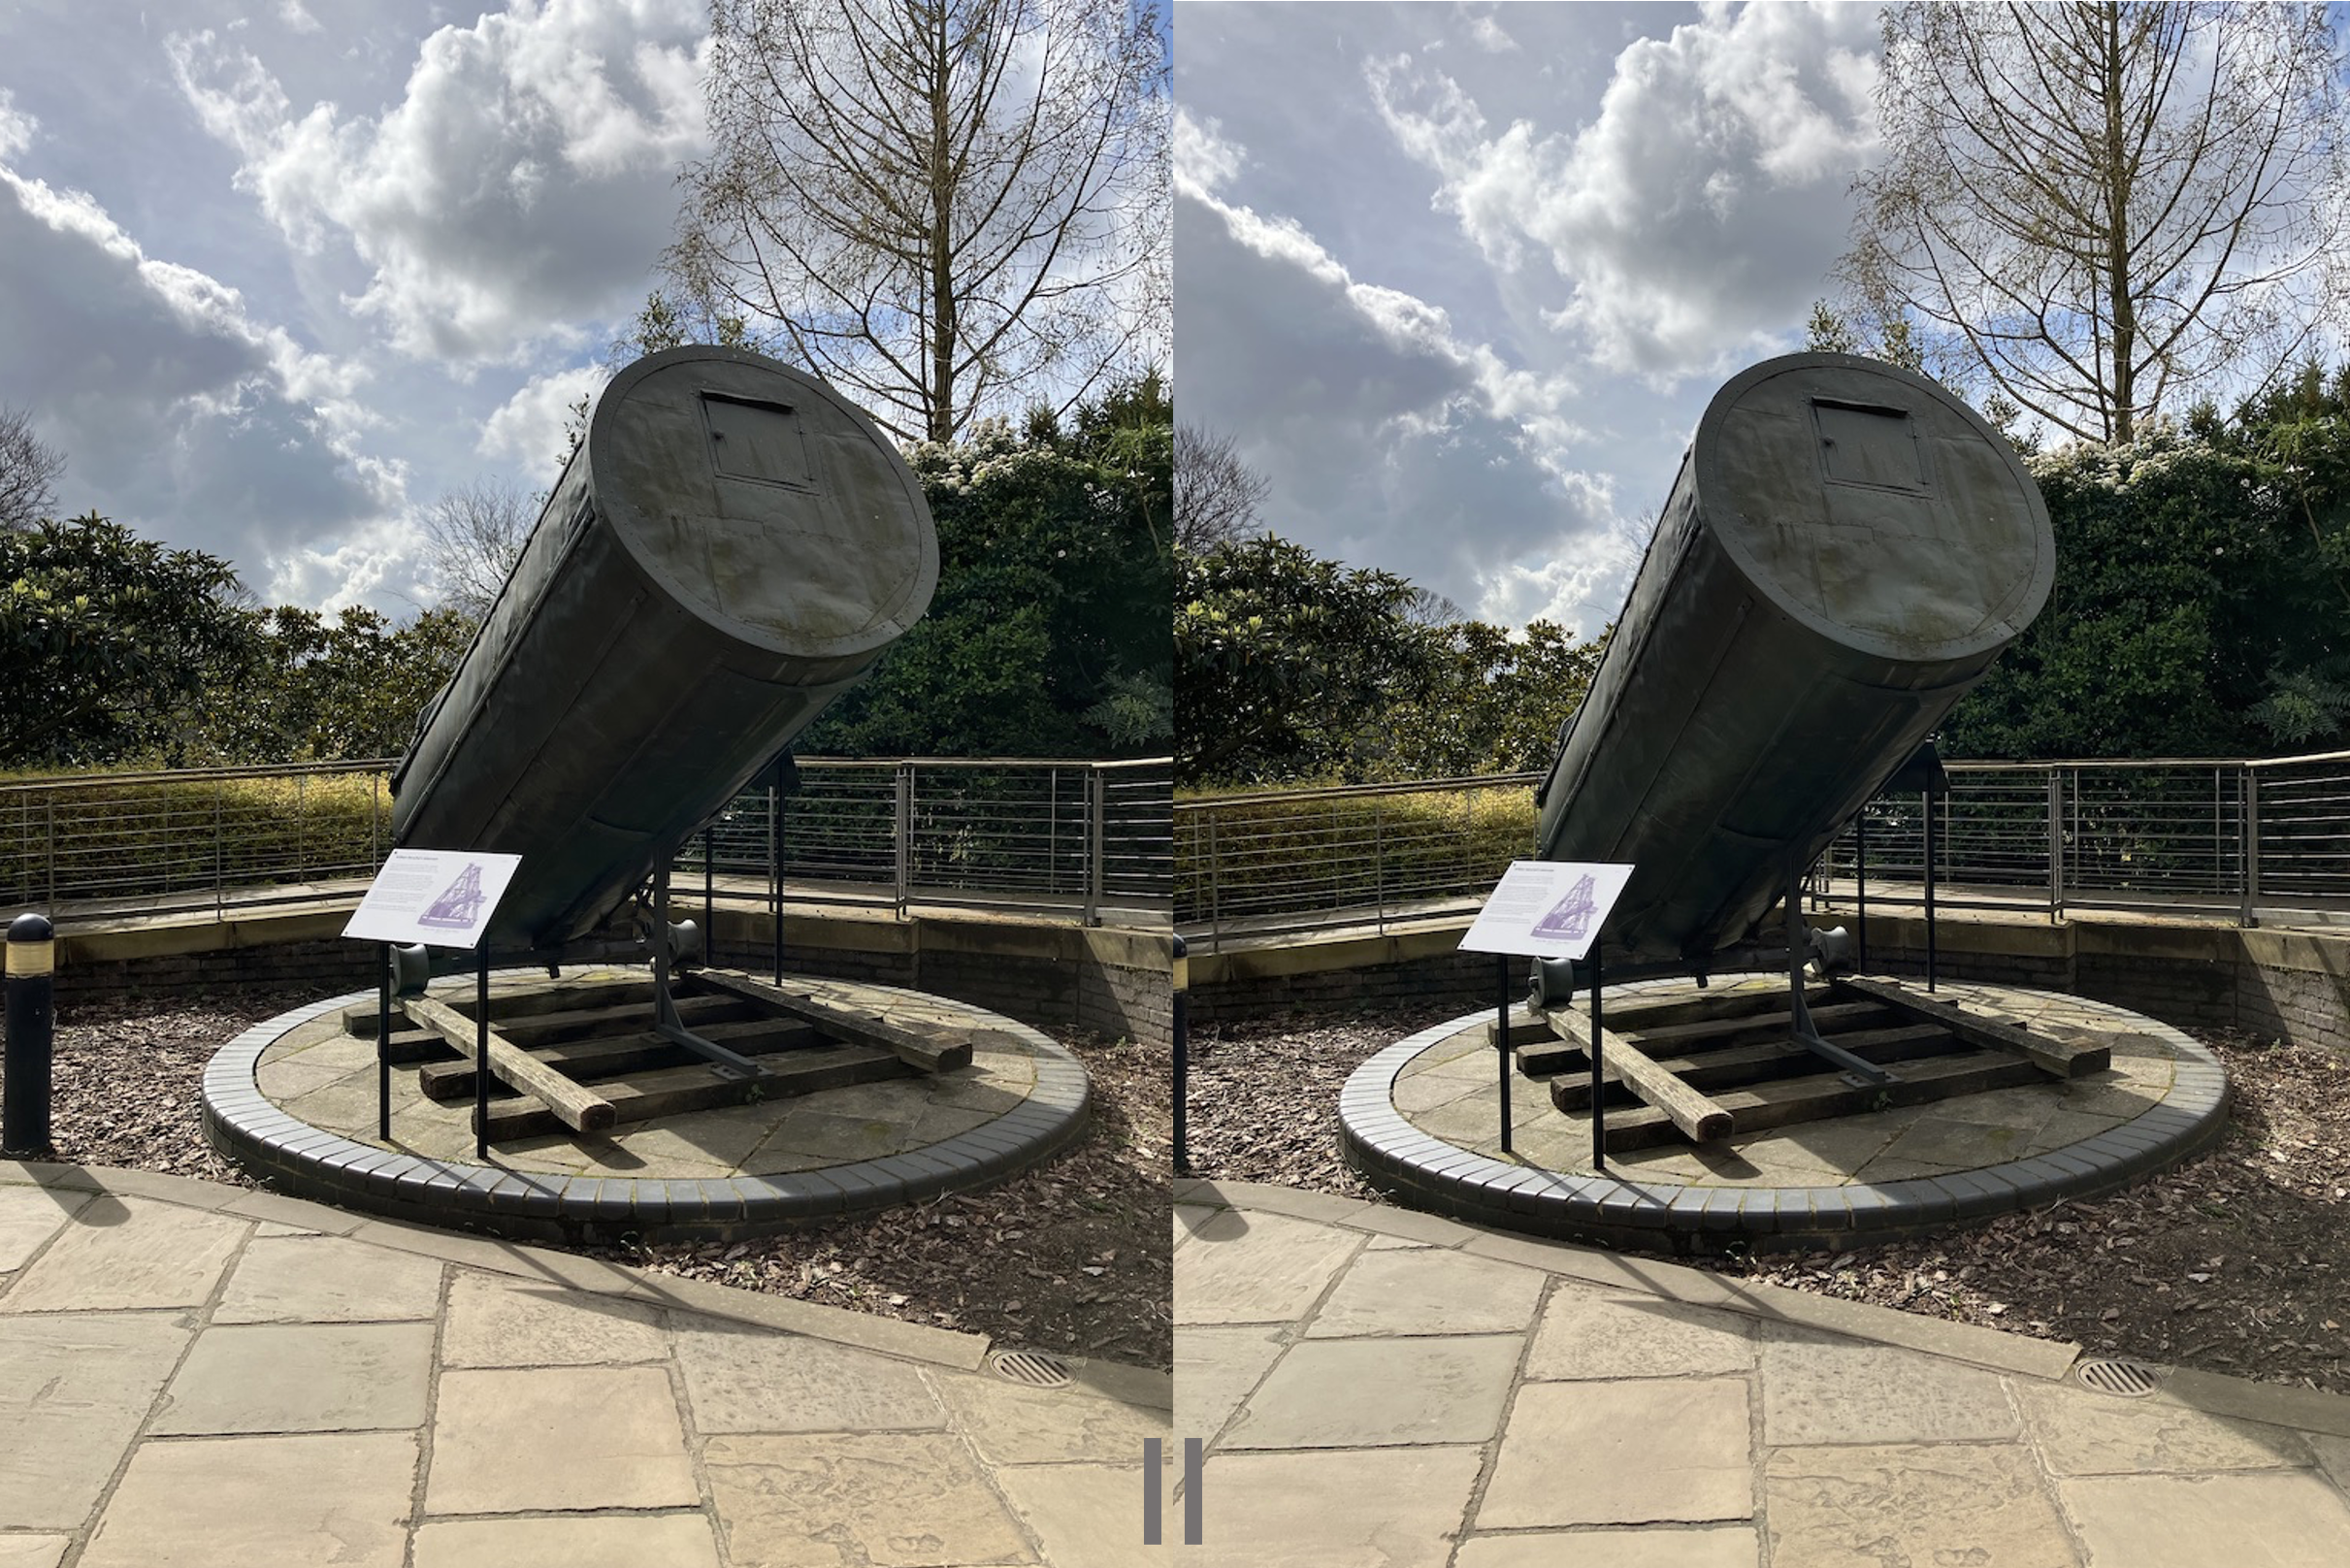
Look in the middle between the two photos above (of William Herschel’s telescope at the Greenwich Observatory, London). Relax your eyes’ focus and your brain will try and combine the two images into a single one. Once that happens you’ll see three photos. The middle one (which exists only in your brain!) gives an impression of depth perception / 3D. It’s quite a nice effect but note that not everyone is able to see this. It does depend on your eyes, brain and your eyesight.
“Stereoscopic photographs comprise two images of the same scene taken from slightly different viewpoints. When these are mounted side by side and viewed through a stereoscope, the observer sees just one three-dimensional image.”
Victorian Virtual Reality: Photographs from the Brian May Archive of Stereoscopy (23 Jun3 2023) Museum Crush
2. Focusing: parallel o^o versus cross-eyed oxo
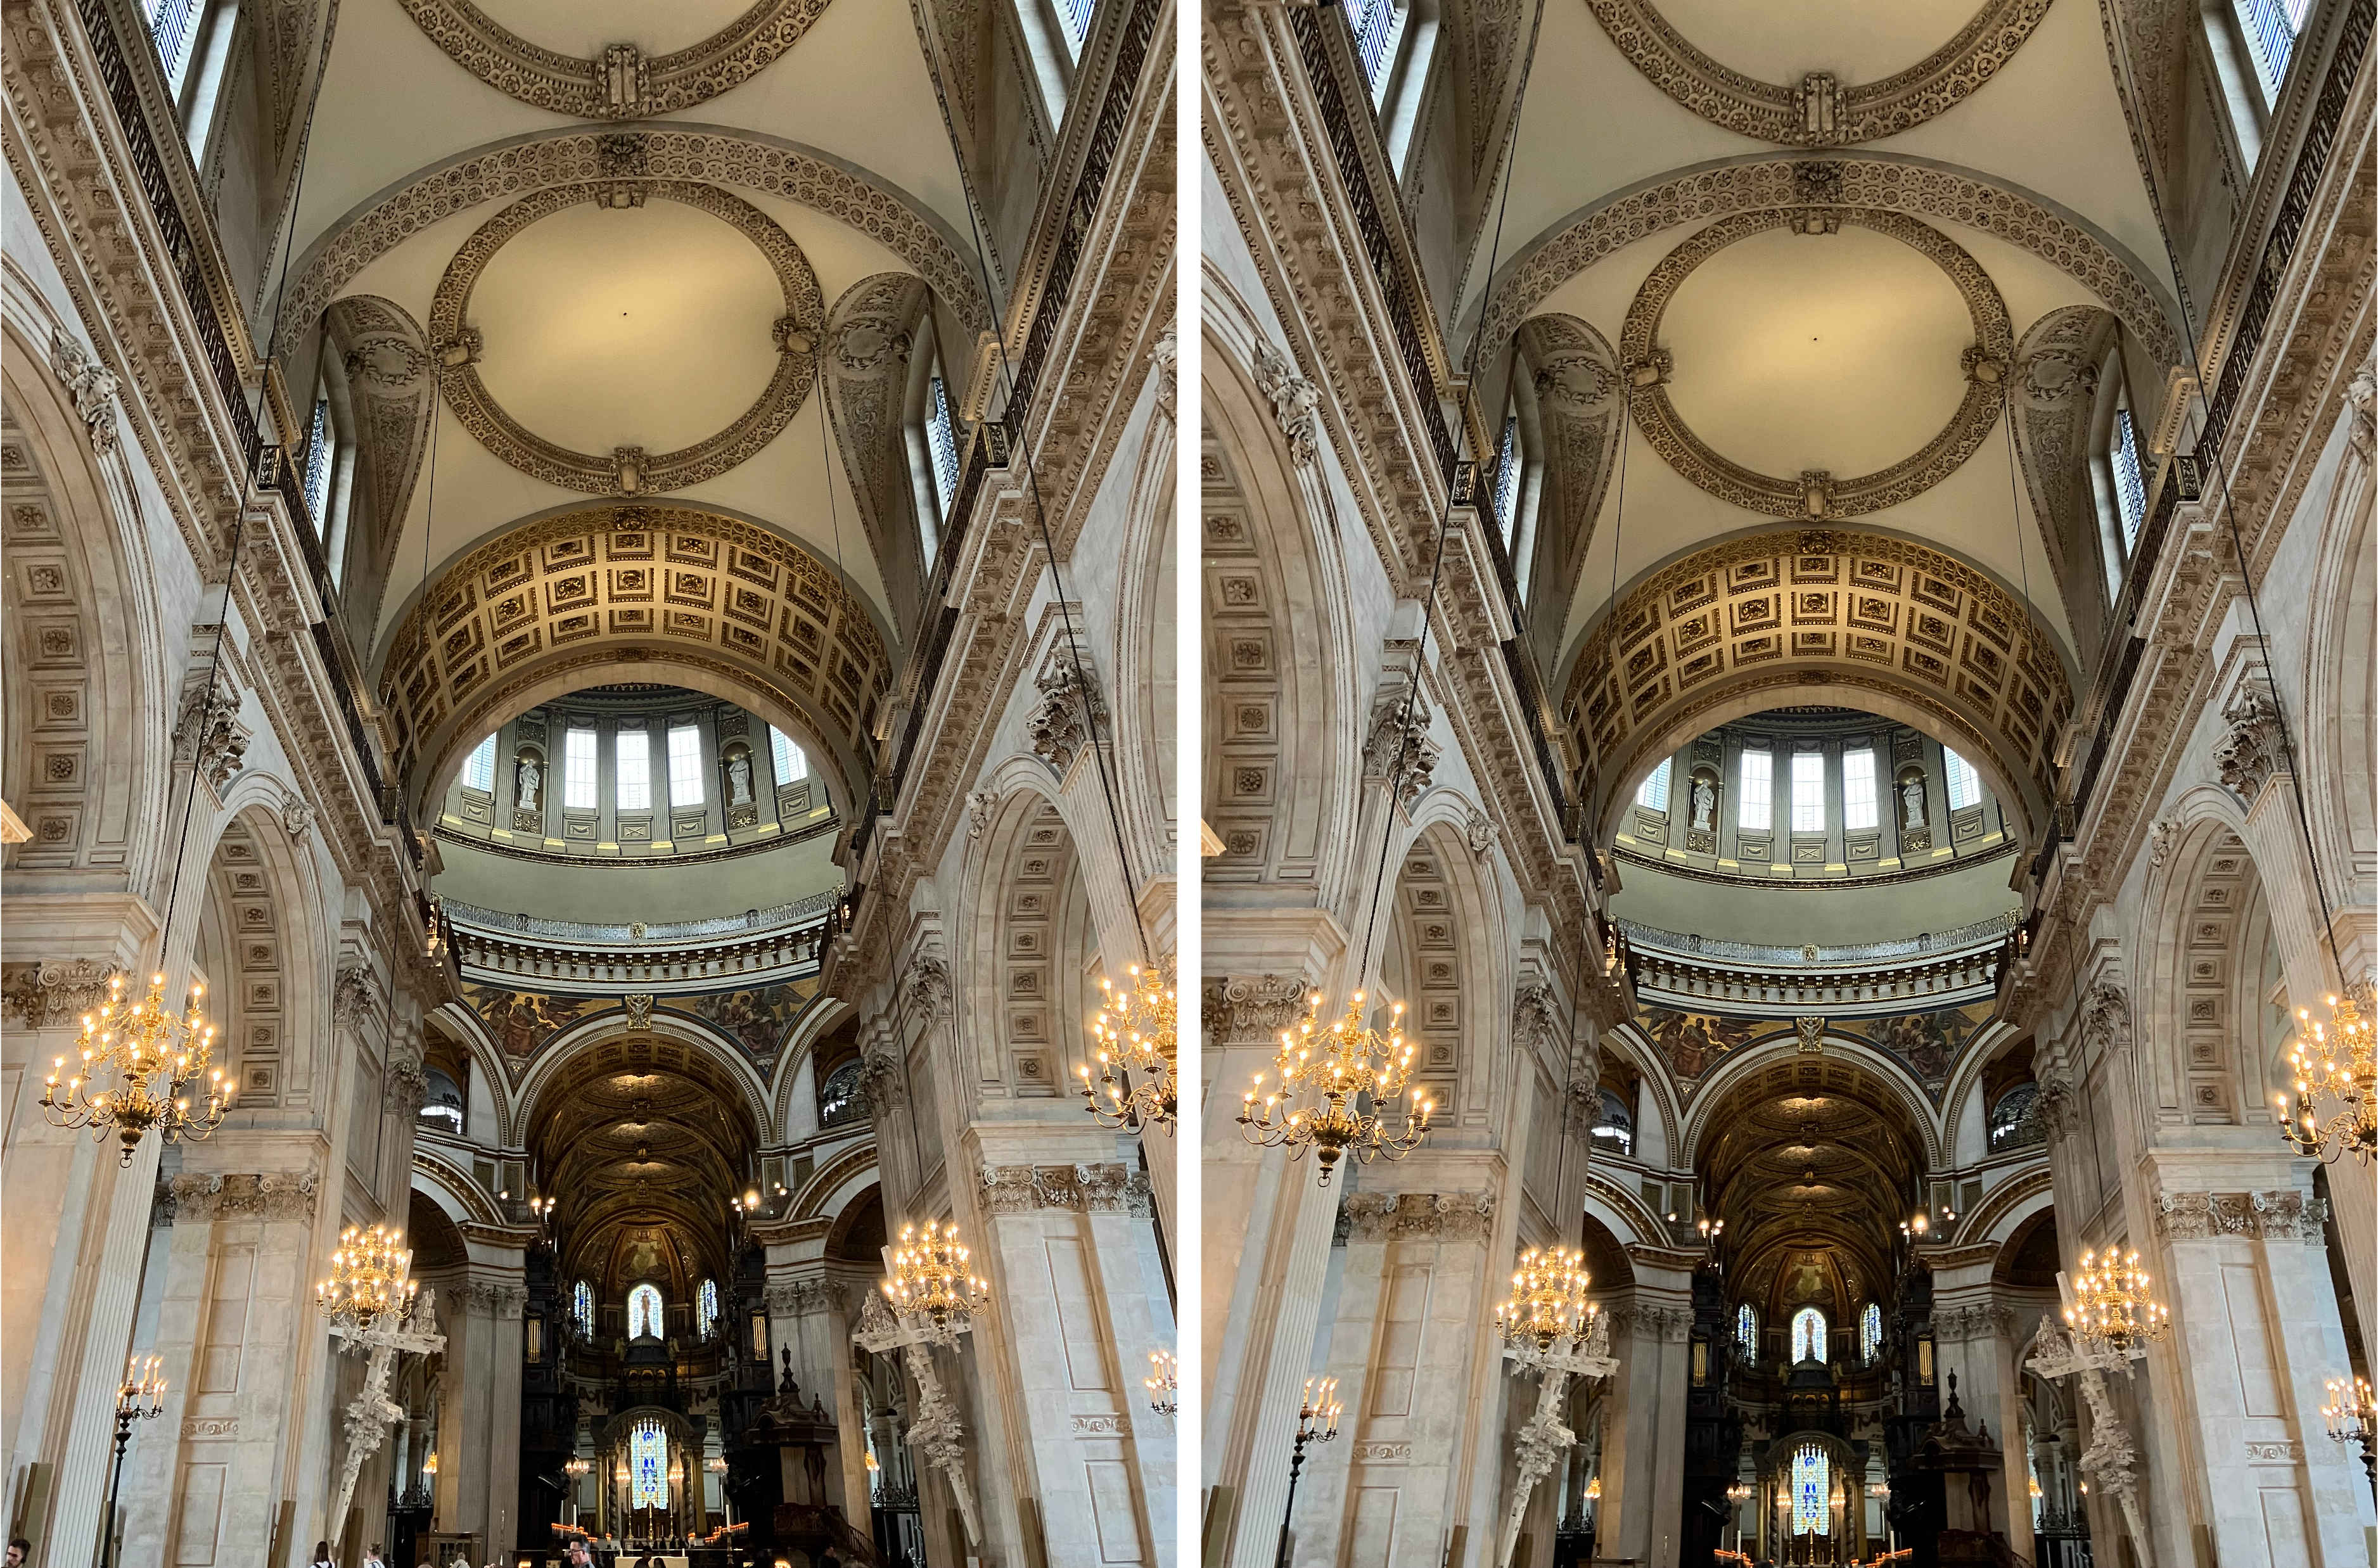
The image pair above is arranged for people who see the stereoscopic effect when their eyes are focused in parallel (they are ‘parallel focusers’, sometimes written as o^o); their left eye focuses on the left image and their right eye focuses on the right image. Some people see the stereoscopic effect by crossing their eyes instead (so they are ‘cross-eyed’ focusers, sometimes written as oxo); their left eye focuses on the image on the right and their right eye on the image on the left. Neither is better than the other. Both types of focusers would see a depth effect but if the photos are arranged ‘the wrong way round’ then it can look like things are coming out of the photograph rather than stretching away into the distance.
Here are two examples of the same pair of photos arranged first for parallel and then for cross-eyed focusing. Which looks right to you? You can click on either image to enlarge the pair then use your browser’s back button to return to this page.

In the files below there are some ready-made parallel- and cross-eyed-focused pairs in the PowerPoint slides for you to try out. There are also individual Left and Right pairs for you to arrange L-R (if you are a parallel focuser) and R-L (if you are a cross-eyed focuser). You can save some time by arranging the photos as L-R-L then o^o focusers can focus between the first two and oxo focusers between the second pair.
It’s more fun to take your own photos and line them up but below are plenty of free-to-use ones to get you started.
3. Files
- Printable instructions (PDF)
- Digital skills used in this project (PDF)
- The presentation slides from the video above (.pptx) (.pdf) – this tells you how to take photographs and line them up
- Notes for educators, if giving the slides as a presentation (PDF)
- Some example photos to play with (.zip) – in case you want to try things out without having to create a set of photos.
4. Even more files and photos to play with
- 00 Even more images – readme – text file, information about the images below
- 01. St. Paul’s Cathedral (ZIP, 188mb) – contains photos of the interior of St. Paul’s Cathedral in London both as raw image files and as ready-to-display stereoscopic pairs. The stereoscopic pairs don’t need further processing so if time is short use these or the Greenwich Park ones.
- 02. Greenwich Park (ZIP, 180mb) – as above, but of Greenwich Park. The Royal Observatory in Greenwich also has some stereoscopic pairs (‘stereoviews’) from the 1800s.
- 03 Miscellaneous photos (ZIP, 380mb) – eleven pairs of photos marked LEFT and RIGHT which need to be lined up for the stereoscopic effect.
All photos taken by Jo Brodie and made available for use without restriction (CC0 licence).
Have a look and see if you can spot the shark in this autostereogram (details and explanation on this page); these types of images were popular in the 1990s as ‘Magic Eye’ pictures.
5. YouTube videos
An explanation of how stereopsis works (your brain combines an image from your left eye with the image from your right eye)
0-32s – how to drag and drop image files from File Manager / Finder Window into PowerPoint
31s – end – how to import the images by inserting picture from file
For Mac users only – how to export images in your Photos app to the file manager / Finder system
For Mac users only – how to drag and drop pictures into PowerPoint (quick method)
6. Further reading
How to Make Your Own iPhone Stereoviews: Basic Tutorial (6 June 2020) Stereoscopy Blog

Subscribe to be notified whenever we publish a new post to the CS4FN blog.
This blog is funded by EPSRC on research agreement EP/W033615/1.

